
Our exclusive discount offers and vouchers on SAAS subscriptions are subject to availability and may be subject to change or expire without notice
Last UpdatedNov 15, 2024
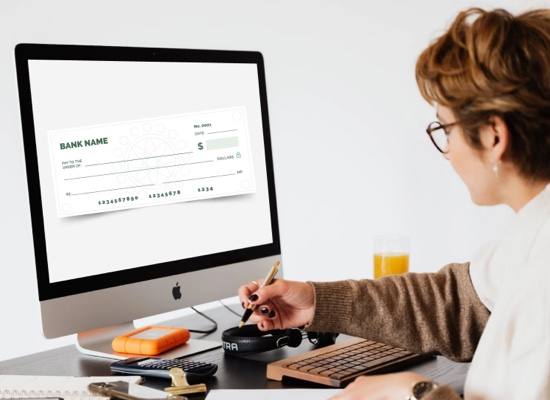
Simplify Your Accounting: Learn How To Print Checks Online In QuickBooks.
In the modern era of digital transactions and credit cards, it’s easy to overlook the humble check as a means of payment. However, as a small business owner, you know that sometimes a good old-fashioned check is necessary. If you’re using QuickBooks, the popular accounting software, including its online version, you have the convenience of printing checks right from your computer.
In this article, we’ll guide you through the process of printing checks online in QuickBooks, ensuring that your checks align perfectly and print flawlessly. Say goodbye to the hassle of handwritten checks and embrace the simplicity of printing them with ease. Let’s dive in!
Print checks refer to the process of generating physical checks using a printer, typically from accounting software such as QuickBooks. It allows businesses and individuals to create professional-looking checks with all the necessary payment details, including the payee’s name, amount and date. Print check method eliminates the need for manual check writing and provides a convenient way to issue payments while adhering to banking regulations and maintaining financial transparency.
According to data from the Association of Financial Professionals (AFP), business-to-business (B2B) payments made through checks actually saw an increase between 2013 and 2016. This can be attributed to several reasons that underscore the enduring relevance of checks:
In an era where digital fraud poses a constant threat, the physical nature of a check provides a sense of security to both parties involved in a transaction. The check serves as tangible evidence of a legitimate payment.
The risk associated with electronic transactions can make individuals hesitant to transfer substantial sums of money electronically. Consequently, it is not uncommon to resort to using checks when making big purchases, offering an additional layer of confidence.
While electronic transfers lack the tangible proof of purchase, paying by check offers a physical record. Simply producing the canceled check or an image from an online banking page serves as verifiable evidence of payment.
When immediate cash is unavailable and credit card usage is undesired, paying by check provides a grace period to gather the necessary funds. With most checks taking approximately two days to clear, this method allows for a temporary extension in meeting financial obligations.
When it comes to accounting, creating a check within QuickBooks Online holds significant importance. The act of creating a check triggers essential accounting entries: the asset account is credited, thereby reducing the checking account balance, while the expense or cost of goods account is debited, resulting in an increase in the expense or cost of goods sold on the profit and loss statement.
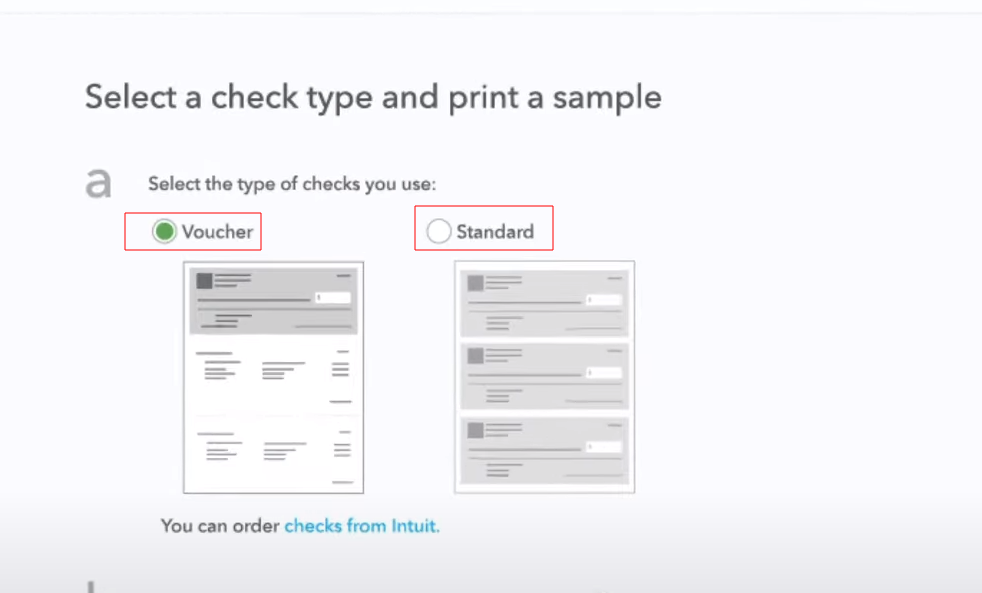
Before streamlining your check printing process, it’s essential to configure the print settings correctly. By ensuring optimal alignment and printer configuration, you can produce professional-looking checks efficiently. Walk through the process of configuring print settings for printing checks with us. From setting up print checks to fine-tuning alignment and configuring the printer dialog box, each step will contribute to a seamless check printing experience.
Before you begin, make sure you have some blank paper ready in your printer for test prints. This way, you can avoid wasting actual checks if you need to adjust the check alignment.
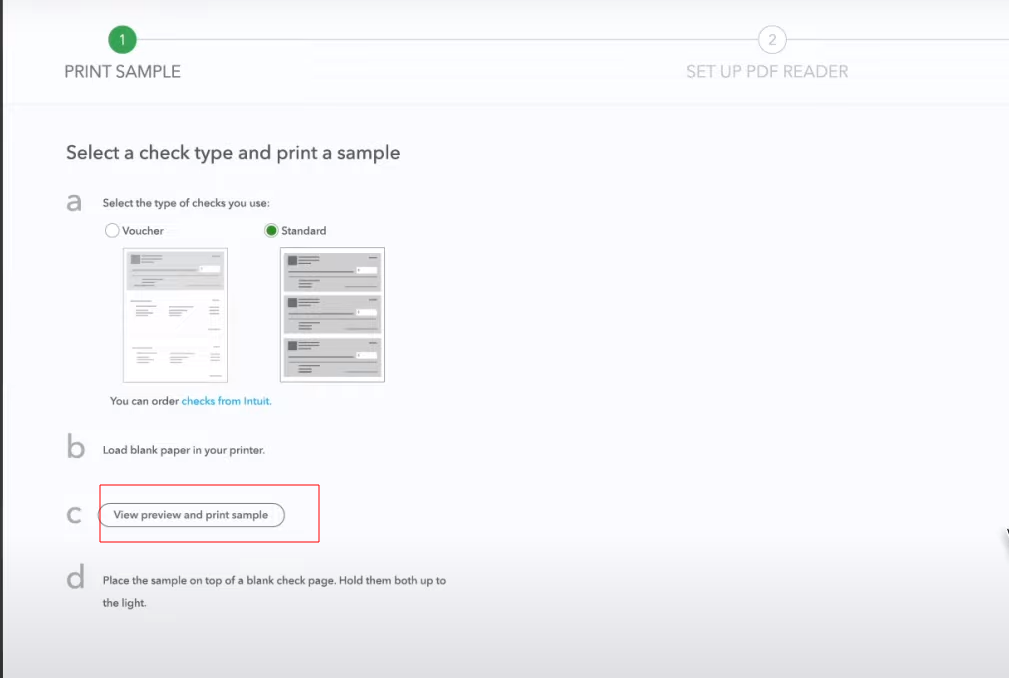
” Then choose “Print.”
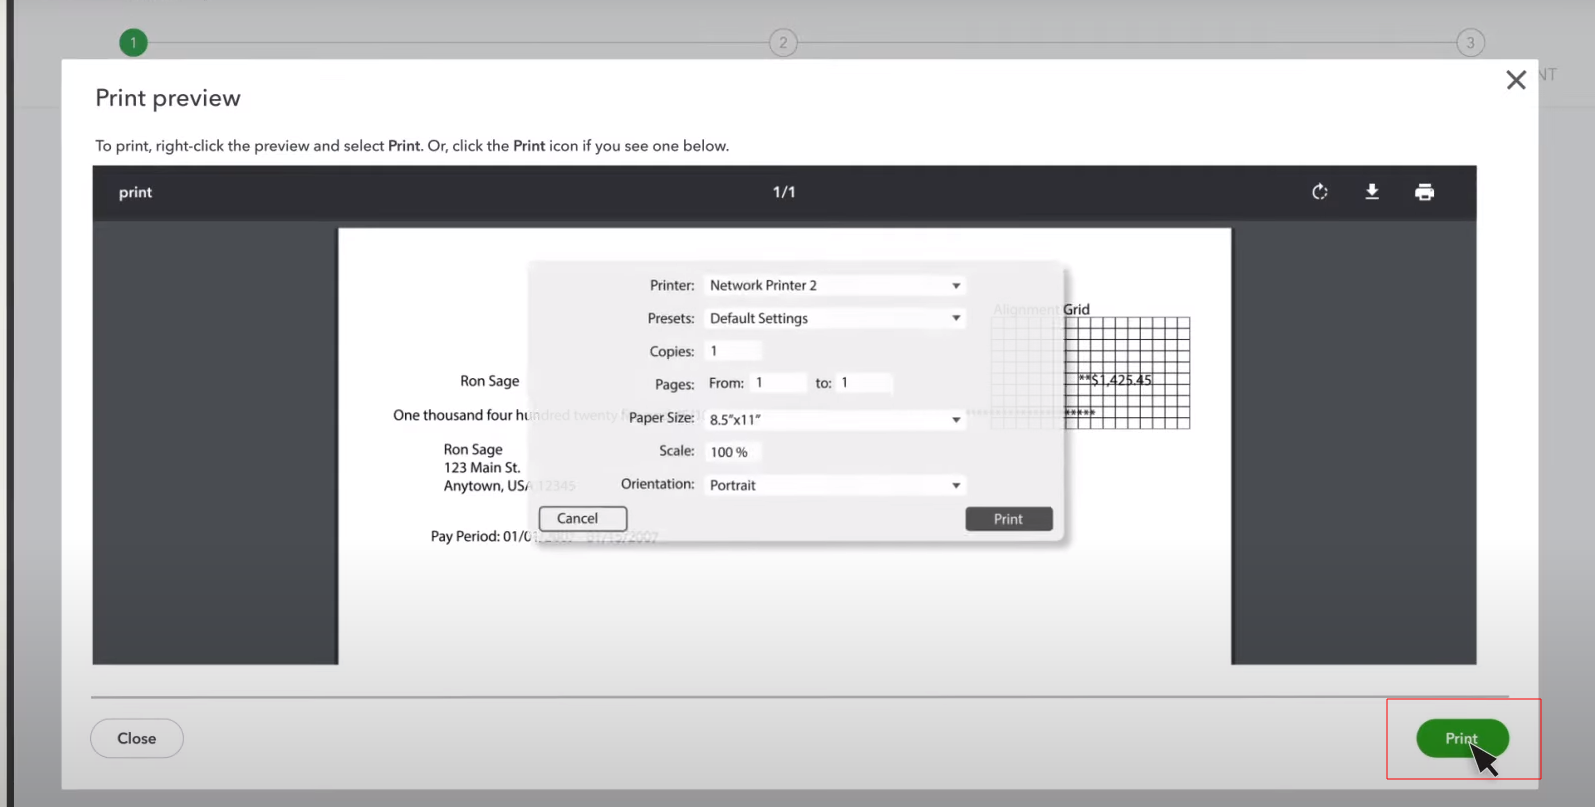
Place the printed sample check under a blank check and check if they align correctly.
If the alignment is accurate, you are all set to print on your regular blank checks.
If the sample print does not align with the blank check, we recommend using Adobe Acrobat for check printing. Adobe Reader is necessary for printing both Standard and Voucher checks. Follow these steps to download Adobe Reader and set it as your default PDF viewer:
Compare the alignment of your sample check against a blank check.
If the alignment appears correct, you are ready to print on your regular checks.
If the check still doesn’t align properly, you can fine-tune the check alignment using the following steps:
Key Point: “The vertical and horizontal fields on the grid are adjustable and allow you to precisely specify where the check amount should be printed.”
If the sample print still does not align properly, you may need to adjust the scale in your printer dialog box. The steps for adjusting the scale or page size vary depending on your printing setup. If you require further assistance in fine-tuning your alignment, refer to the troubleshooting resources for printing checks and forms. Alternatively, for specific printing alignments, you can find relevant information on setting up paychecks, 1099 forms and sales forms.
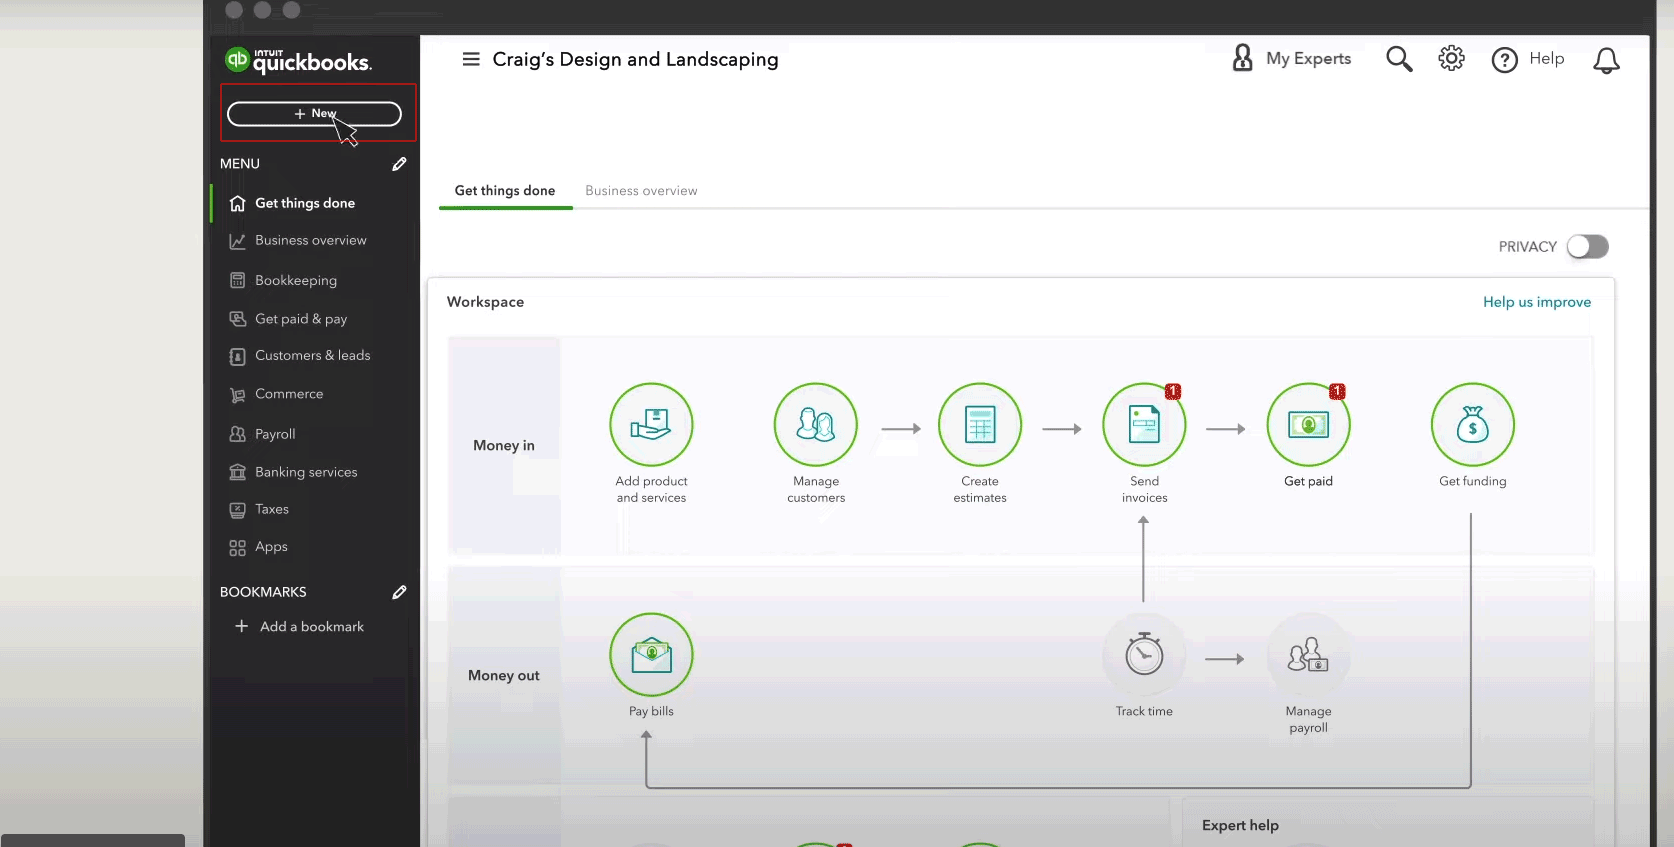
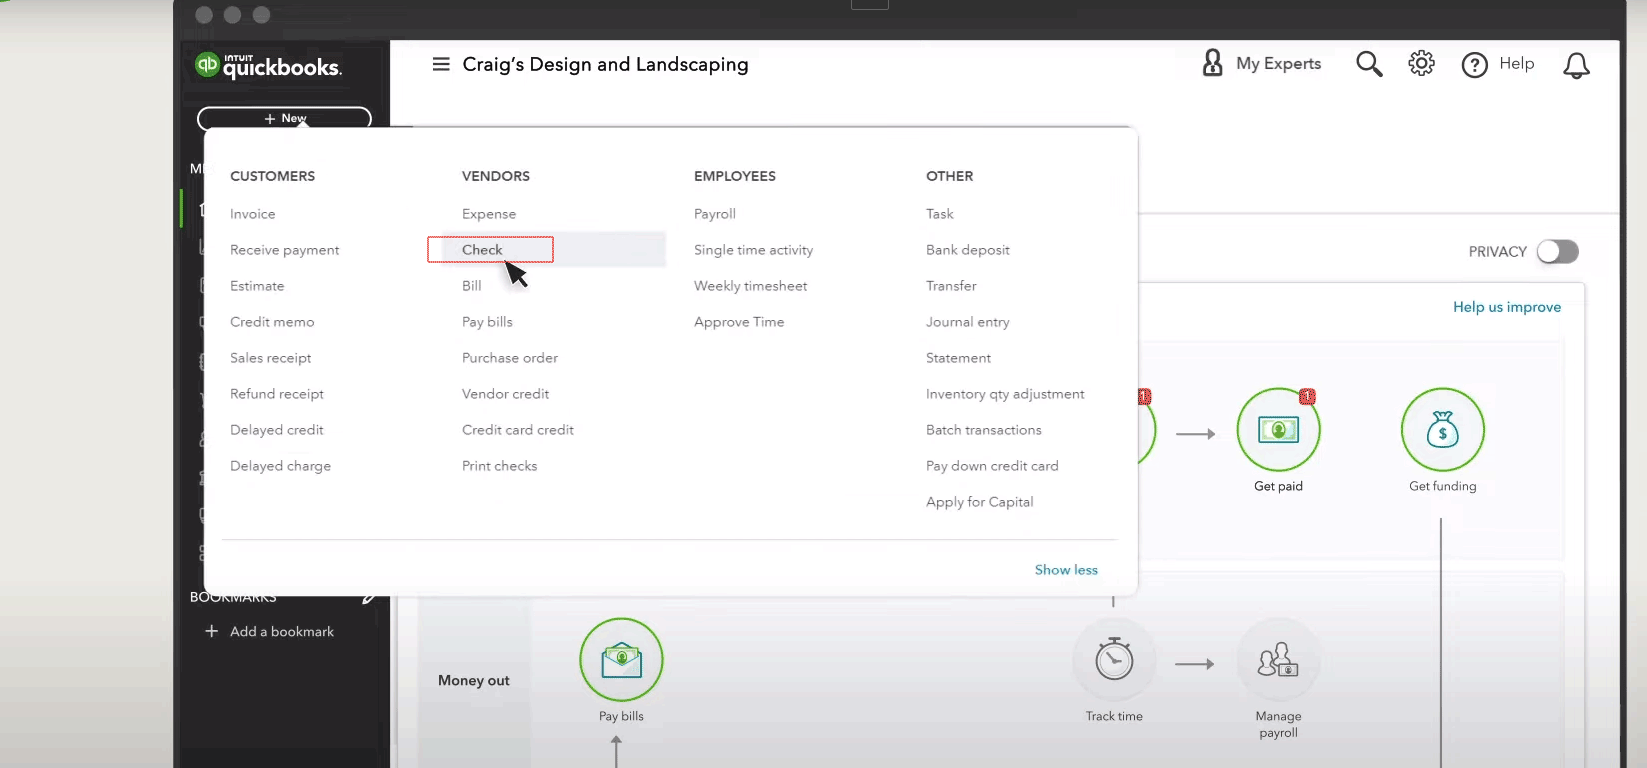
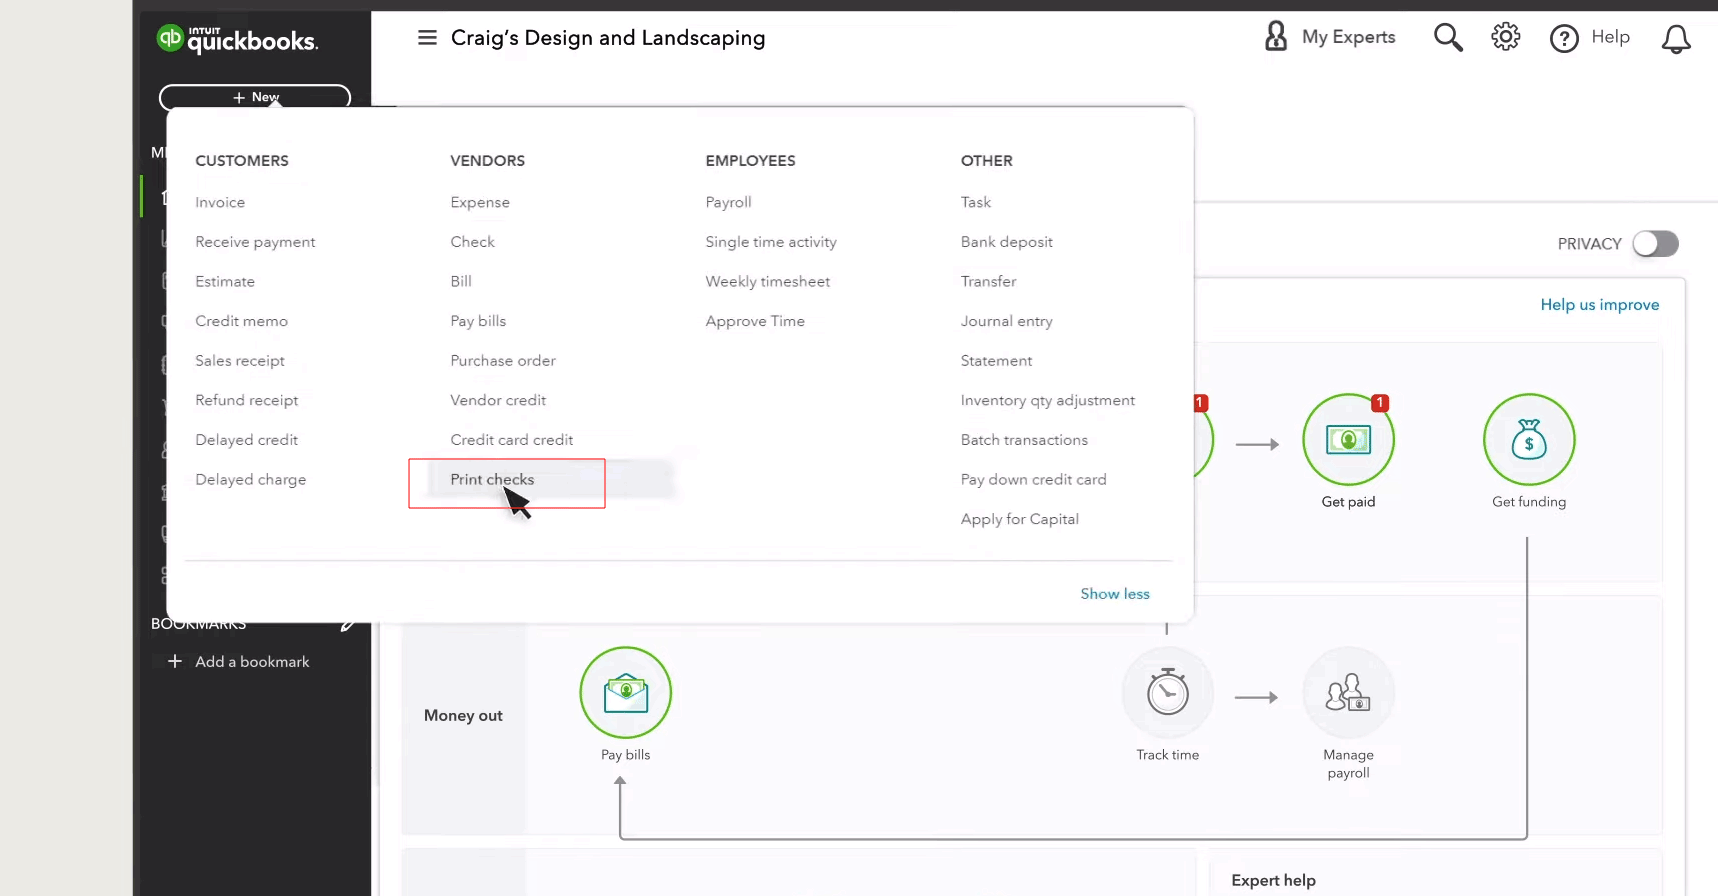
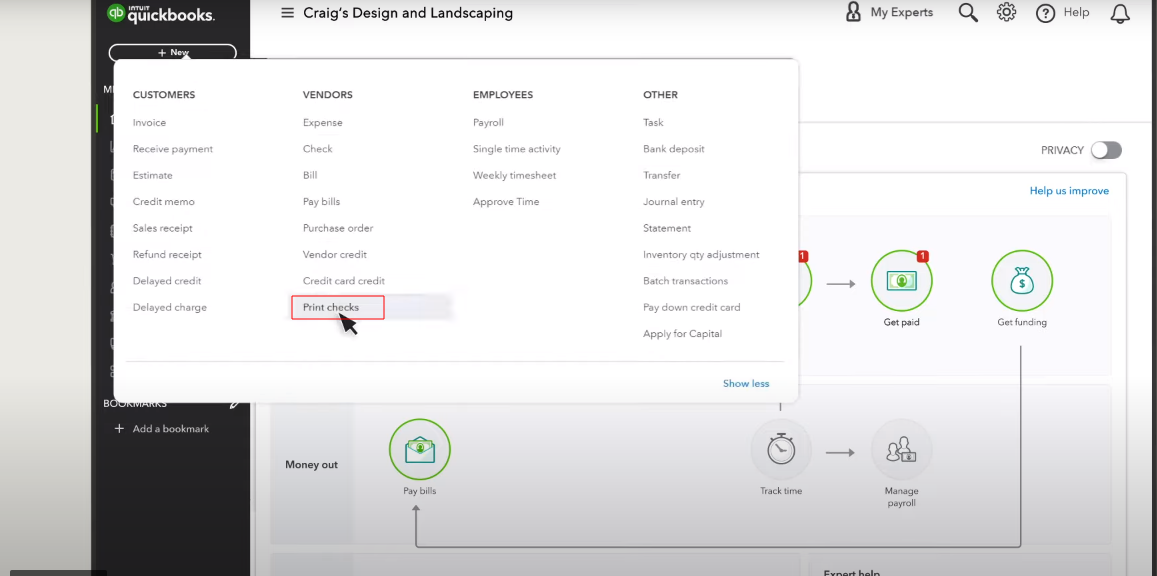
If you’re using QuickBooks Online you have the advantage of easily printing checks directly from your computer. In this guide, you can go through the step-by-step process of printing checks in QuickBooks, empowering you to simplify your payment workflows and maintain accurate financial records. Let’s get started!
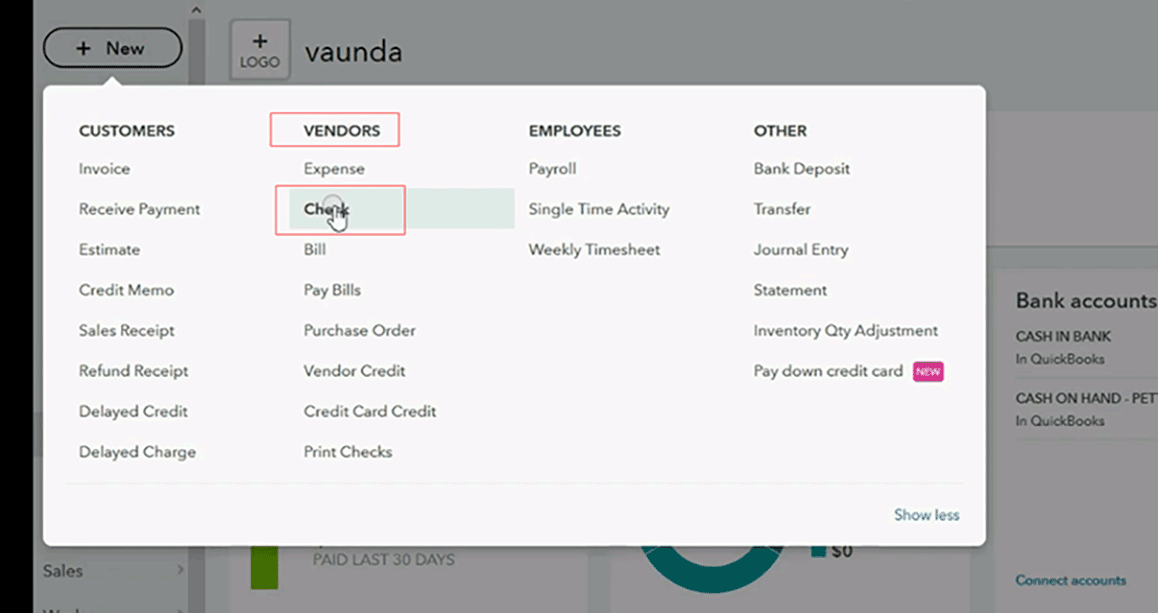
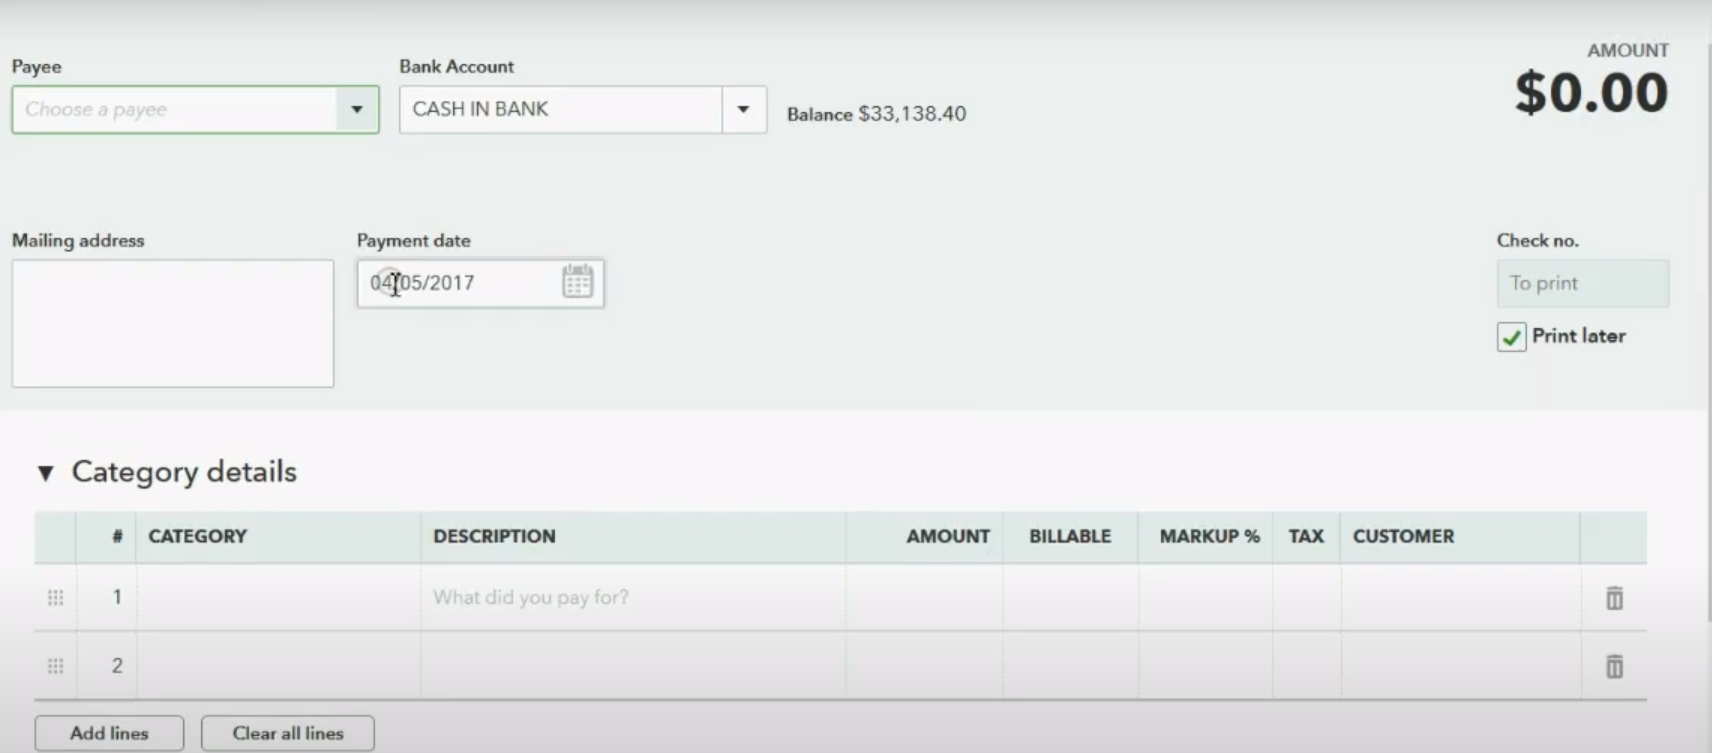
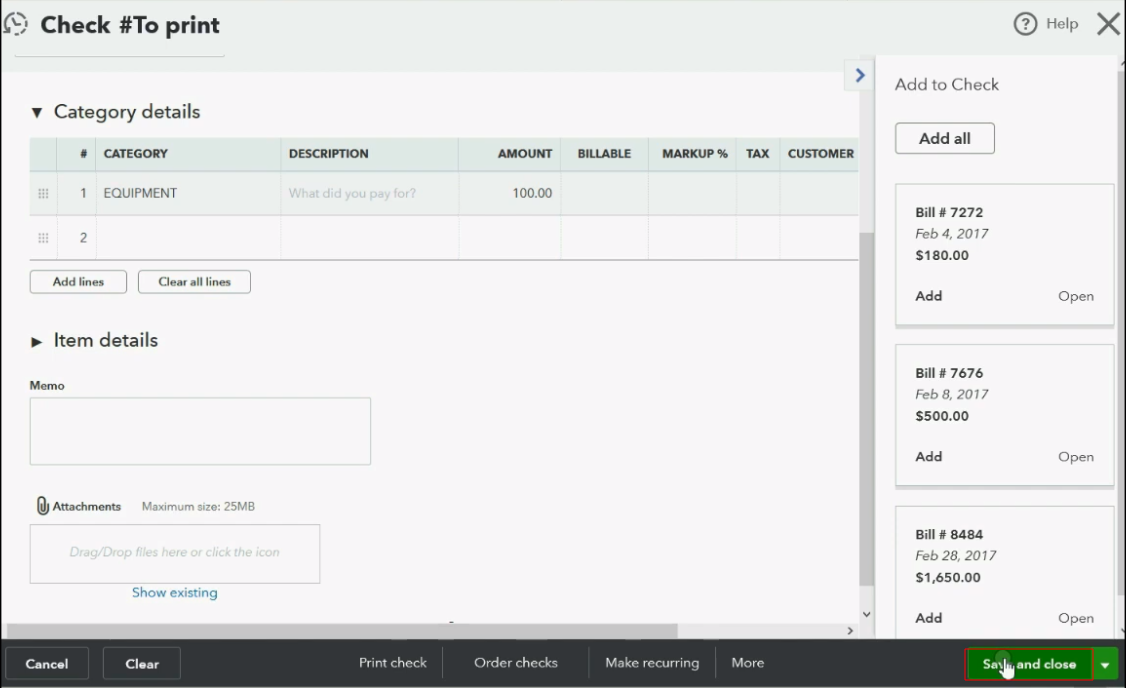
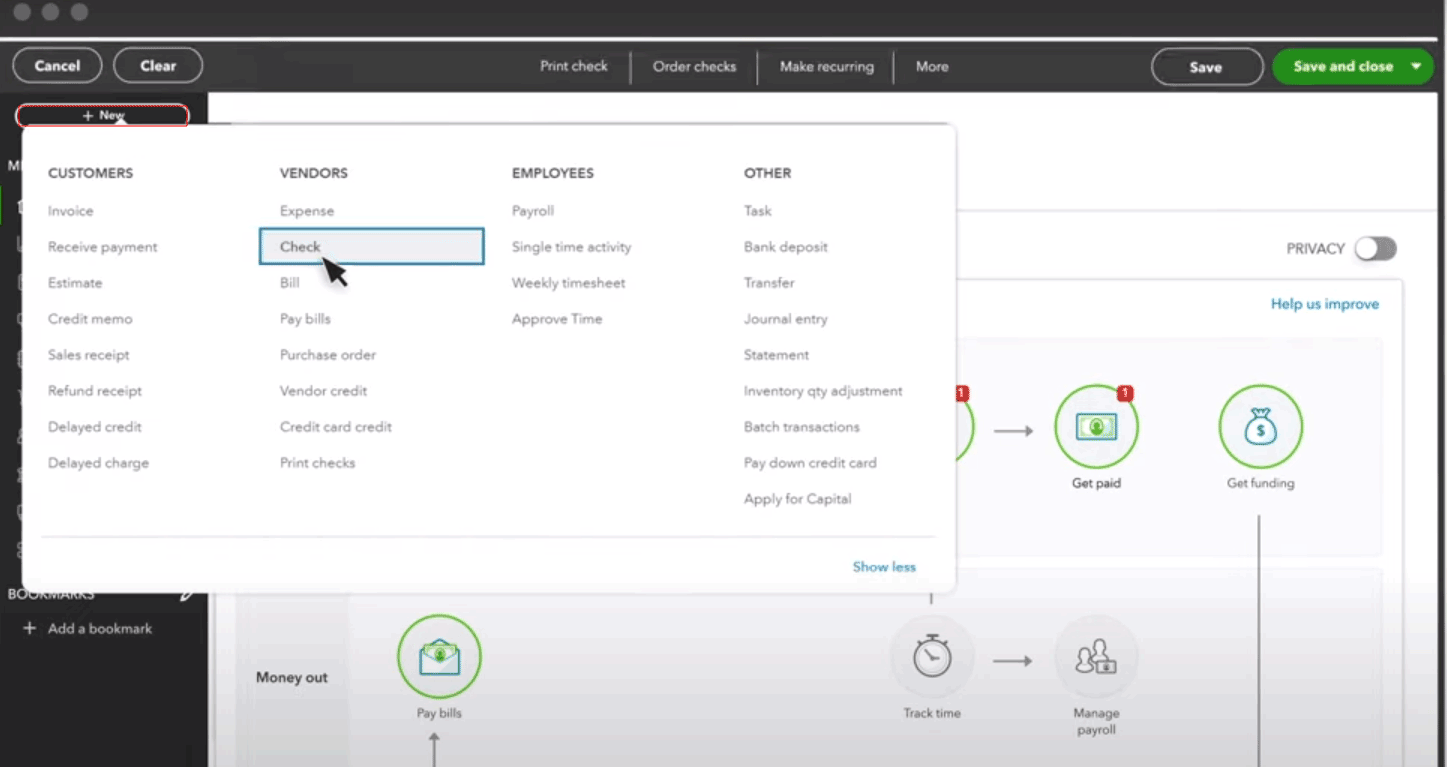
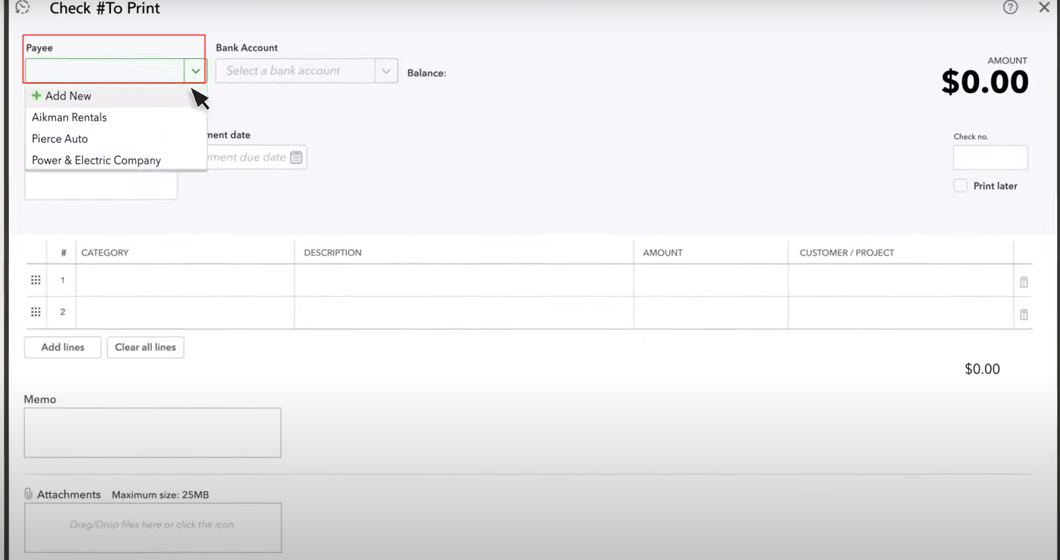
You can accurately record checks in QuickBooks Online and create checks for printing to maintain organized and precise bookkeeping. Here’s how:
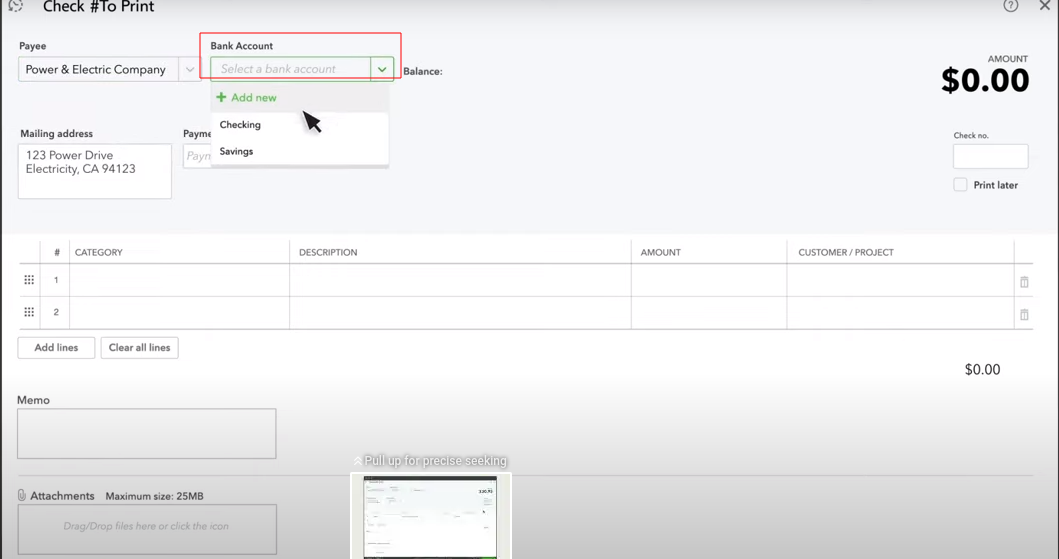
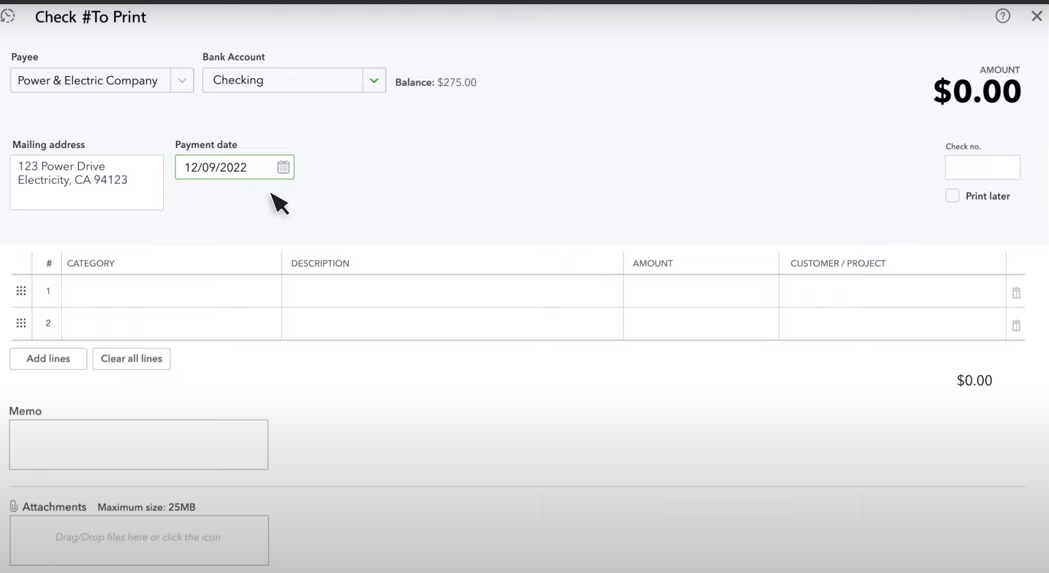
Key Point: “If you need to reuse a check number, uncheck the “Print later” checkbox. When you save the check, a confirmation message will appear to inform you that the check number already exists.”
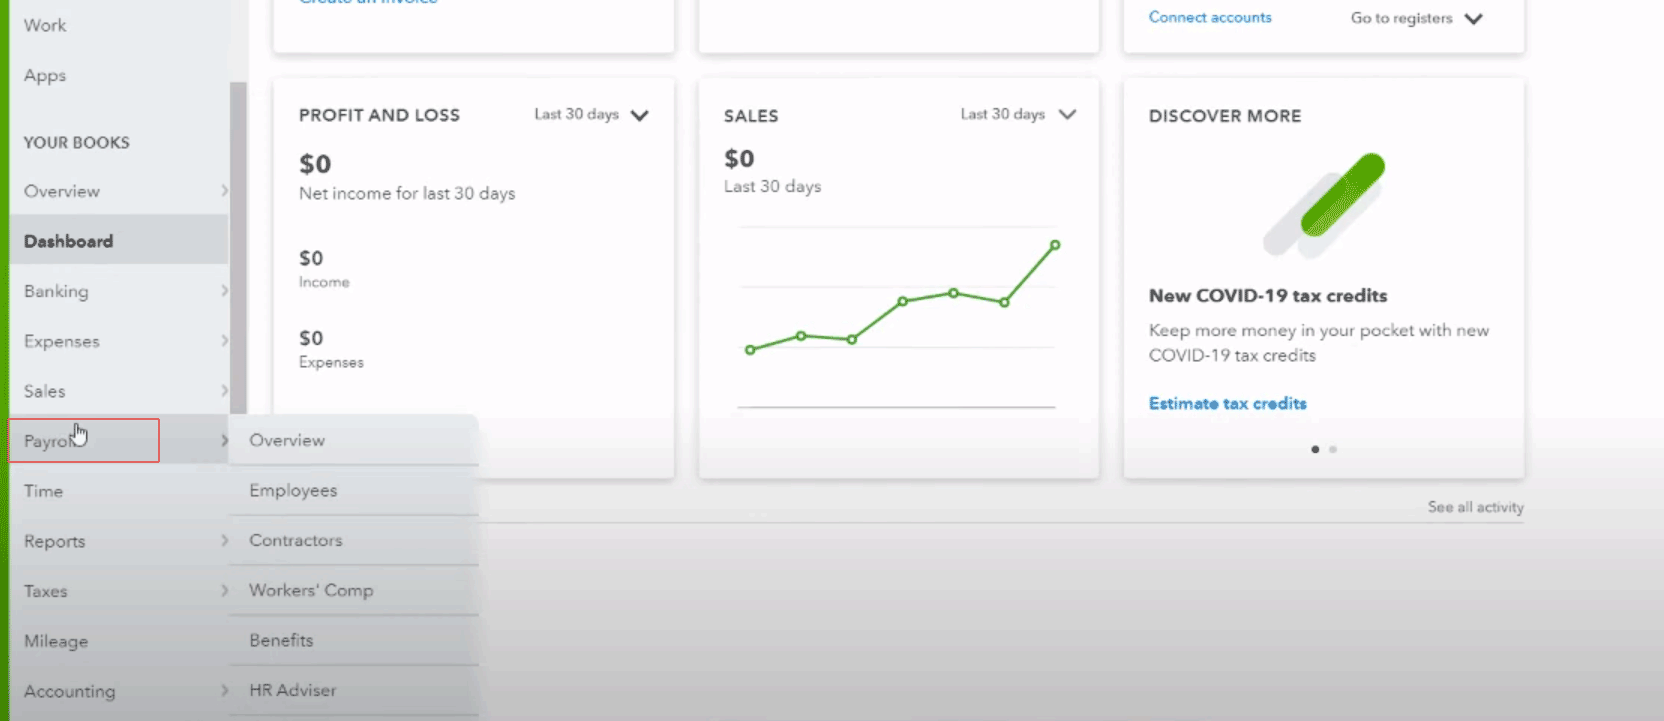
To print a paycheck in QuickBooks Online Payroll, follow these steps:
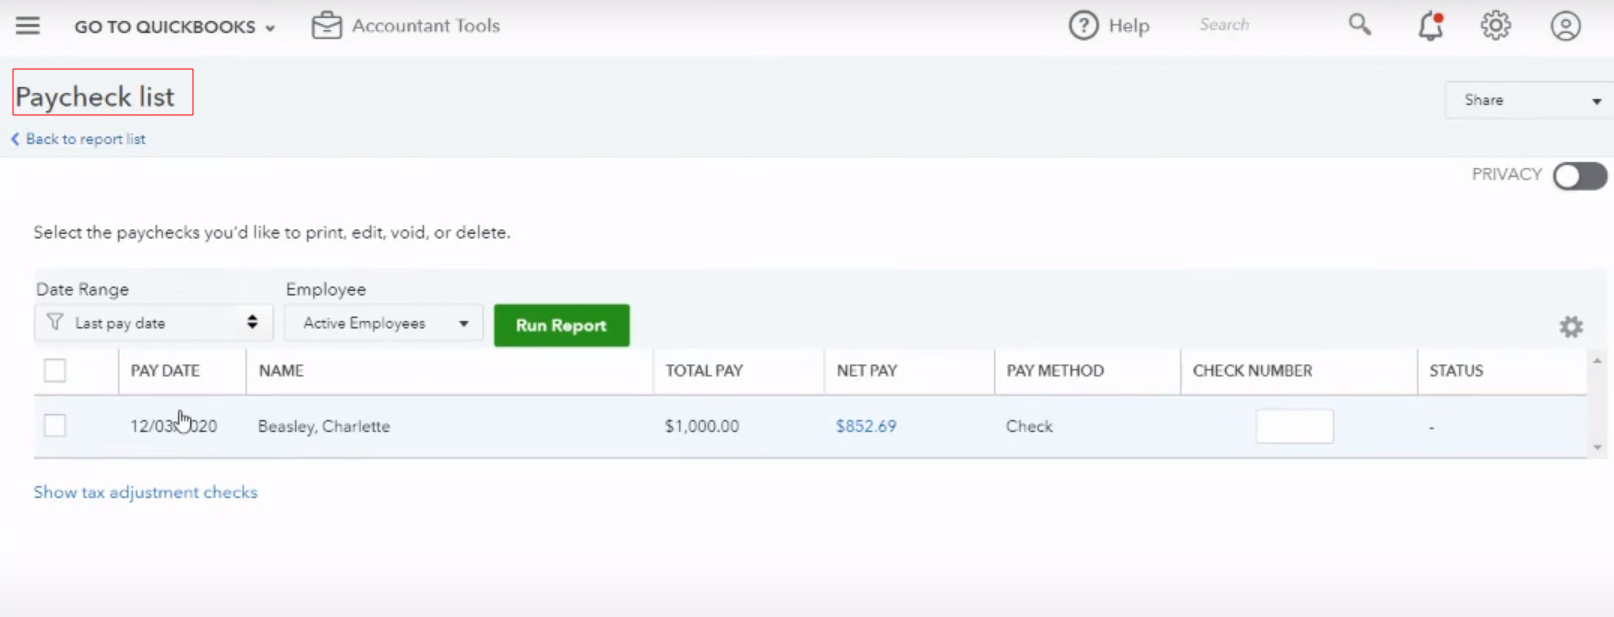
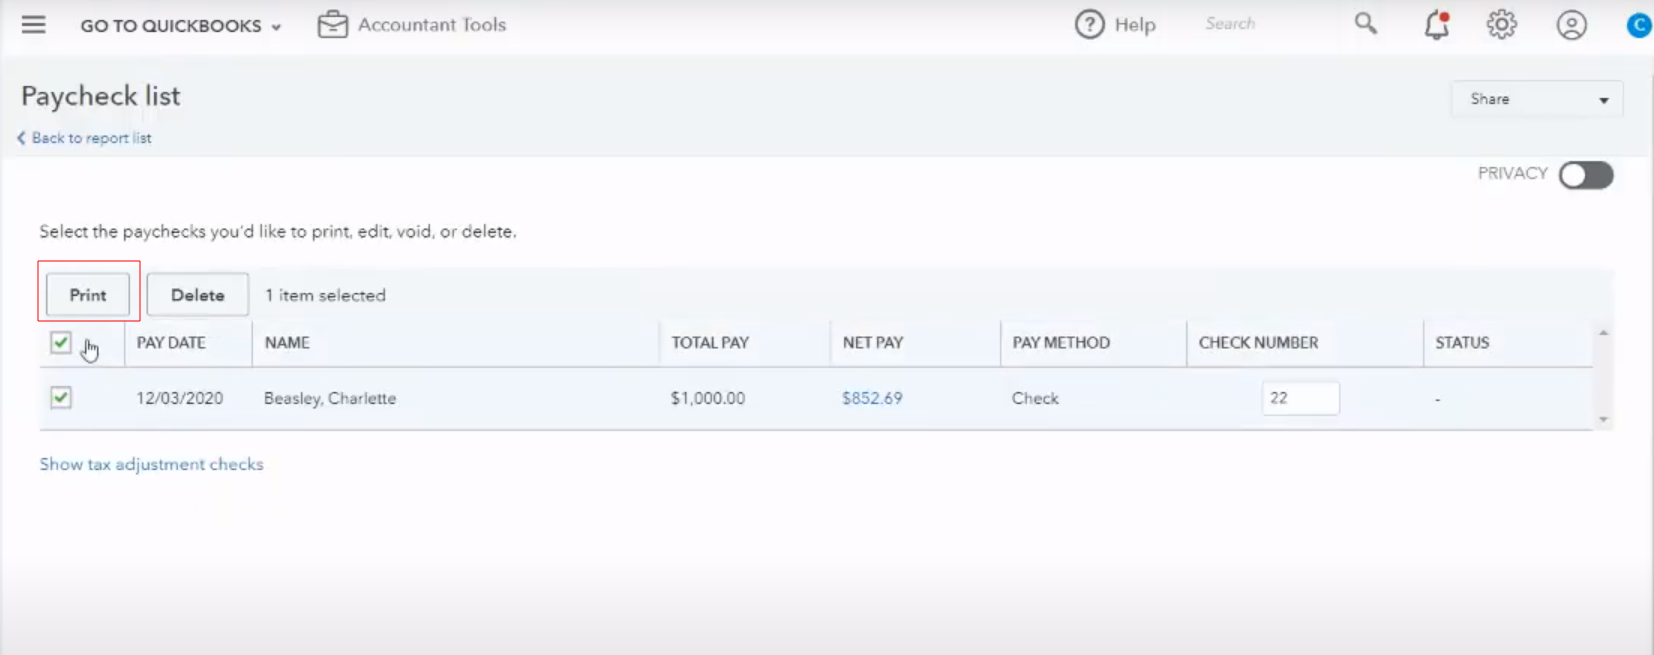
By following these steps, you can easily reprint a single paycheck or multiple paychecks as needed, allowing you to keep accurate records and provide necessary documentation.
QuickBooks Desktop offers a range of valuable features that enhance the check printing process. Here’s why you should consider printing checks directly from QuickBooks Desktop:
With QuickBooks Desktop, you have the flexibility to print checks one at a time or in a batch. Whether you need to print a single check or multiple checks at once, QuickBooks Desktop accommodates your requirements, saving you time and effort.
If you prefer not to print a check immediately, QuickBooks Desktop allows you to save it for future printing. This feature enables you to prioritize and manage your check printing according to your needs, ensuring a more organized approach to your financial transactions.
QuickBooks Desktop supports the printing of various types of checks, accommodating diverse payment scenarios. Whether you need to print standard checks, voucher checks, or other specialized check formats, QuickBooks Desktop provides the necessary versatility to meet your specific check printing requirements.
Moreover, when you print checks directly from QuickBooks Desktop, the payee information is automatically populated from your vendor contact database. This eliminates the need for manual data entry, reducing the chances of errors and saves valuable time.
Additionally, for bills that have already been entered into QuickBooks Desktop, the check amount is automatically filled in, further streamlining the payment process. You can even use the same check to pay multiple bills, making it convenient to handle multiple transactions efficiently.
In conclusion, printing checks in QuickBooks offers businesses a secure, efficient and convenient method for managing their financial transactions. With step-by-step guidance provided, empower yourself to align checks accurately, configure printer settings, and streamline the payment process. Embrace the benefits of printing checks in QuickBooks to simplify your financial management and ensure accurate record-keeping. Say goodbye to manual check writing and enjoy the ease and professionalism of digital check printing with QuickBooks.
With over 200 years of combined industry experience, our Editorial Team at Top10Ratings is a diverse group of expert reviewers, product analysts, and content experts. They come from backgrounds in renowned product testing labs, acclaimed review platforms, and leading market research firms. Together, they ensure that every review, ranking, and insight offered on Top10Ratings is comprehensive, expert-driven, and trustworthy. Their dedication to authenticity and clarity guarantees that our readers always receive reliable and actionable advice.
![Unlocking Ahrefs Premium: Get Ahrefs Premium Accounts [100% Free]](https://s44815.pcdn.co/wp-content/uploads/2023/10/Ahrefs-Free-Premium-accounts-2023-330x250.webp)